Hello everyone, welcome to another video!
So this week, we cut some firewood in the top paddock so we can move some pigs in. We do some walling, some fencing, and we move some brambles in a unique way. And I attempt three lime recipes this week.
Moving the Pigs

So we start this video, as you saw last week, the pigs have plowed everything where they are, the young pigs. And we've noticed it's very green up here. So what we're going to do is remove the firewood is here, cut it up. I've got a little job for this little stick here. Once everything is cleared out here, we’ll make sure the perimeter fence is secure. After that, we’ll get ready to move the piglets up here. We’ll double-check that everything is safe and sound. And then, here we go!
So I'm going to attempt to extract this large tree that I failed uh last year, get it out where it is, and chop it up for logs. Just looking at um these little grubs. I don't know what they are. If anyone can idea ify them, they certainly make a mess of pine trees.
Clearing and Fencing

Go stuff's really wet in oh for go all loaded up uh logs on the back, which need to go into store cuz they're all fairly wet. All these, when you strike an ax into them, you get water around it, so these really need drying off. And then I've got six boxes of kindling up the front which will um which we use, obviously get the fires started.
So, to give the pigs a bit more room, I’m taking this fence down. I originally put it up to stop the goats from jumping on the rock. Since we’re not having goats anymore, it’s no longer needed. And um I was hoping to do this before the pigs turned up. Uh yeah, I'm going to take this down, and we're going to move it so they get access to this more Lush grass on no food, it's not food time, you know that. Don't be chewing things, come on. Really are come on come on come on whoa whoa whoa nothing fighting plastered.
Bramble Wrangling and Rock Barriers

Now I have to go and get some of the cut brambles. I'm hoping I can pull it back over so I don't have to get involved with the pigs again. Let me show you how tough this stuff is. Because of all this thick, lush growth here, I brought the digger down to move a few rocks. The goal is to create a better barrier in this area. Um definitely need a better barrier here, and I'm going to attempt to erect this as a fence post here. Yeah, we’ll put this up as a fence post here. Then I’ll reuse the fence I just took down and run it from that corner over to this spot. I’m also planning to put a gate right here, and another gate at the far end. That way, the pig shelter can be used here during the day as well. At night, we’ll move them back to the other area. They’ve pretty much eaten through everything over there already. They’re getting right through all the vegetation, so we need to give them some fresh fodder to feed on.
CU it's a nice Gate Post so good. So we've got it sort of balanc in there. I found this nice, square-sided rock here. I’ll probably place it on top of this one to add some support in this area. If I can get something to brace the front of it, that should help. Then we’ll see how it goes. I may try and do is flip it on this other side, get the straw out, and then ease it up towards the other Rock no.
Temporary Fencing and Pig Expansion
So, after a rainy night, you can see what I’ve set up here. This is just a temporary fence, guys. And yes, there’s a temporary gate as well—very temporary. I built this wall entirely using the mini digger—no hands involved. I’m pretty pleased with how it turned out. There are still a few brambles and bits to clean up, but that will come with time. Right, let me do a quick explainer. So the idea is to extend the pigs’ area just a little bit. There’s still a lot of green growth here, compared to down there where there’s not much left. Look at them—muddy faces and all. You guys have been busy!
We’re going to give them access to this section for a few weeks. There’s plenty here for them to eat, especially with oranges dropping from the trees, which they absolutely love. So let’s let them into this area. I’ve built a wall here, and for now I’ve just dug out this edge so they can’t jump up. These three large stones can all be moved. Eventually, I’ll dig this back further and place the stones along here to form a proper granite wall. That should make this a more permanent area for them. The same goes for this massive stone here. Once it’s moved and the ground is dug back, the plan is to create one solid granite wall along this whole section. There are a few spots where I’m slightly concerned about them escaping, especially where there isn’t a wall yet. But honestly, the brambles are so dense that I don’t think they’ll get through—we’ll find out. Up here is part of their old area, and you can see there’s still plenty of green growth. Again, lots of brambles, which should slow them down.
I’ve also put in a temporary barricade between these two rocks and a temporary gate here. With granite on one side and thick brambles on the other, we’re hoping this setup works. The main goal is to give them more food and stop them from eating things they shouldn’t.
So Andre’s going to do the honors—come on, piggies, piggies. I’d laugh if the first thing they did was try to escape… well, maybe not laugh. Come on, in you go. There you are, guys. Why are you all heading up there? That looks like the easiest escape route—but don’t worry, there’s more room for you here during the day. Just like we said, they’ll only be in this area during the daytime. They can eat and roam around here, and then at night we’ll move them back into their main compound. Once they’re fed, we’ll shut the gate so they stay in safely. They really love this stuff—there’s plenty here for them to chew on, which should keep them busy. The most likely escape spot is over here, but with all these brambles, I’m hoping they won’t get through. You’ve got lots to eat now, guys. Hopefully that keeps you happy. Honestly, the things we do for you!
Duck Antics and Pond Plans

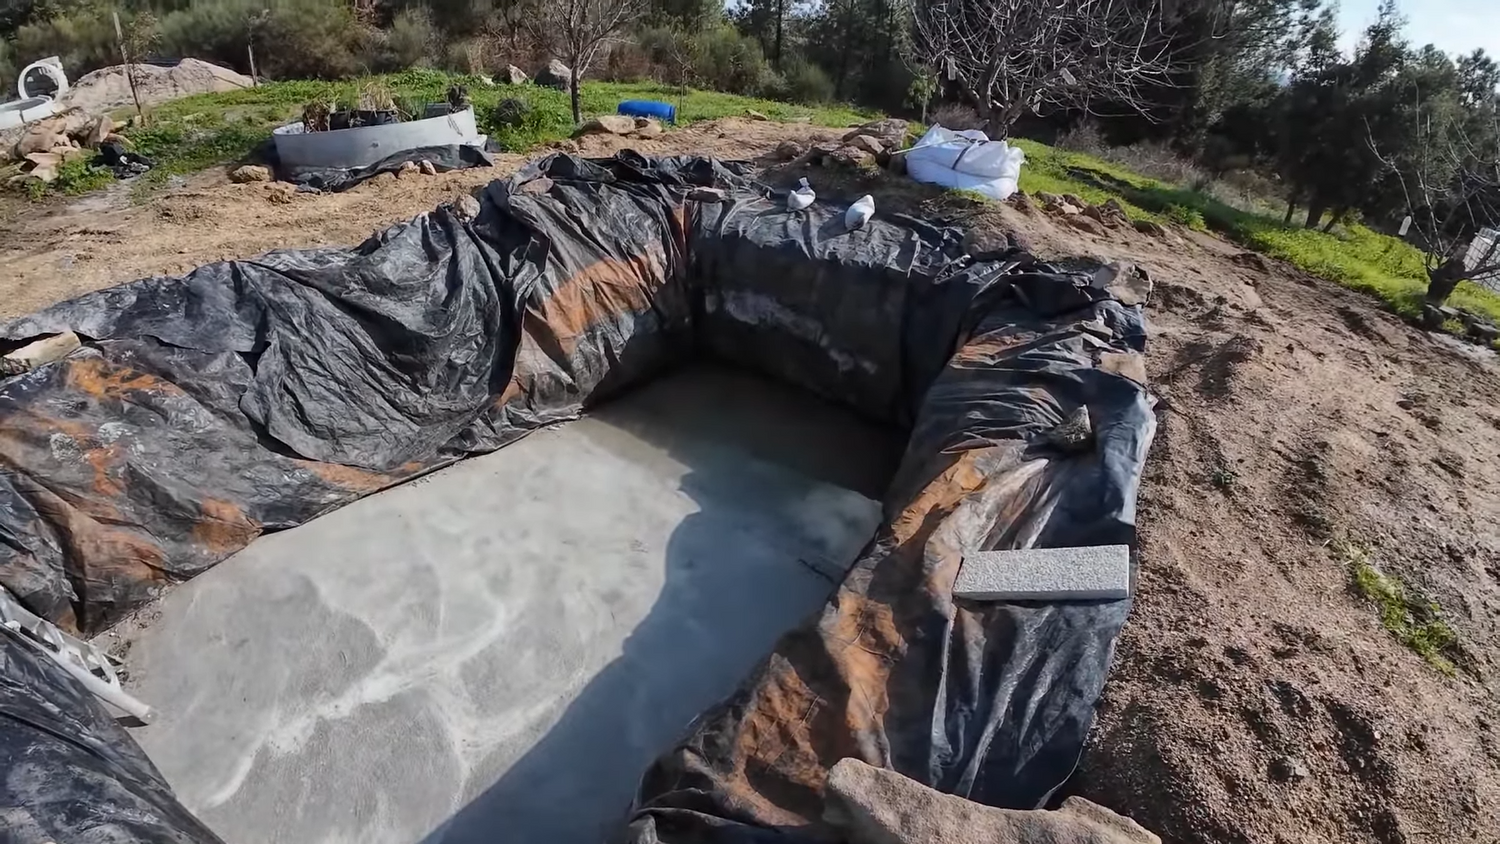
One of the challenges of having free-range ducks is that they go wherever they like. We’re still an hour and a half from feeding time, and they already know exactly where the food is—don’t you? Come on, duckies, you’ll have to come down in a minute. Go on, one of you be brave. You managed to get up there, after all! So we had massive rain last night, in fact enough to put a couple of feet of water in the pond.
So, in case you’re wondering why I haven’t started the block work in the pond yet, this is the reason. At this time of year, when we do get rain, it’s usually very heavy. What I don’t want is to lay a few courses of blocks and then have it rain overnight. The cement needs time to dry and cure before it gets wet, and rain is really not ideal for fresh block work. So for now, I’m going to hold off until we have at least a full week of decent, dry weather in the forecast.
Lime Time: Three Recipes!

So Anne asked me to pick some limes, and I did—look at this, a whole bucket full. They smell absolutely amazing, so the first thing I’m going to do is give them a quick wash. Just look at that, they smell divine. Now, what are we going to do with all these limes? I’m planning to use them in three different ways, but only one of them will be fully finished this week. I’m going to start a lime pickle, which I’ve made before, but that’s quite a long process. We’re also going to make some salted limes, which take time as well because they need to ferment. The one project that will be started and finished this week is lime marmalade. And yes—I wanted to make key lime pie… oh really, now you tell me!
Lime Pickle
I’m using almost the same recipe we shared in a previous post (Episode 184). This time, I’m working with 13 limes, which comes to just over one kilo, or a little more than two pounds. The limes will be cut into wedges—eight pieces per lime. I’ll then add turmeric, salt, and our homemade apple cider vinegar. Once everything is combined, the mixture will sit in the pot for about four weeks. During that time, it will be stirred daily and kept loosely covered with a tea towel. With that plan in place, it’s time to get started.
With all the limes neatly cut into wedges, the kitchen already smells incredible. I transfer the limes into a clean jar. Next, I add four heaping tablespoons of salt. This helps draw out the juices and supports the natural fermentation process. Next, I add three tablespoons of turmeric. I then pour in about a tablespoon and a half of our homemade apple cider vinegar. Exact measurements aren’t critical for this step. Everything is then given a good stir to combine the flavors. Once mixed, the jar is loosely covered and left to sit for up to four weeks. I give it a quick stir each day, and we’ll check back in on this little beauty once it’s had time to develop.
Salted Limes
Next up are the salted limes. I started by selecting washed limes and checking how many would fit into each jar—twelve limes per jar worked well. I left some headspace in each jar. This allowed me to add glass fermentation weights later. The weights help keep the limes fully submerged in the brine and prevent overflow during fermentation.
Once the kettle boiled, I poured the hot water over the limes. The aroma released immediately was incredible. This step helps soften the lime skins slightly, which supports the brining process. After a gentle shake, I prepared the brine. I used just under two liters of water and added four tablespoons of salt. The mixture was stirred well until most of the salt dissolved.
With the brine ready, I arranged the limes evenly in the jars. I topped them up as needed. Then I added the glass weights to keep everything fully submerged. The jars were then sealed and left to ferment for about two weeks.
After fermentation, the salted limes are ready to use. They can be cut in half and squeezed into drinks like lemonade, sparkling water, or plain water for a refreshing tonic. These are often known as Chinese salted limes or Chinese preserved limes and are traditionally valued for soothing sore throats. As a bonus, they leave the kitchen smelling absolutely divine.
Pig Swap and New Pastures

Apparently, salted limes are also great in a mojito—so that might be next on the list. Change of plans for this morning: instead of moving the smaller pigs, we decided to move the bigger ones into a new area. They’re starting to run out of food where they are now, and I also need to get a couple of small jobs done in their current space. So I put on the pig cam and got to work. As soon as they realized food was involved, they came running. The goal was to gently block them from going the wrong way and guide them in the right direction. That turned out to be easier said than done. After a bit of encouragement—and the usual mischief from Bubbles—they finally started moving. We managed to guide them in the right direction. In the end, they got to where they needed to go. Moments like these are chaotic, a little funny, and very much part of everyday life here.
This is the kind of stuff they really love—plenty of greenery and grass to keep them happy. They’ve almost completely stripped the other area, so this gives them something fresh to graze on. After a bit of encouragement, everyone started settling in. We’ll need to move the water over to this area. I’ll also add some extra bedding to make the space more comfortable. A small amount of dry feed was put down as an extra enticement. Sometimes that little incentive helps everything fall into place.
Solar Pump Spotlight

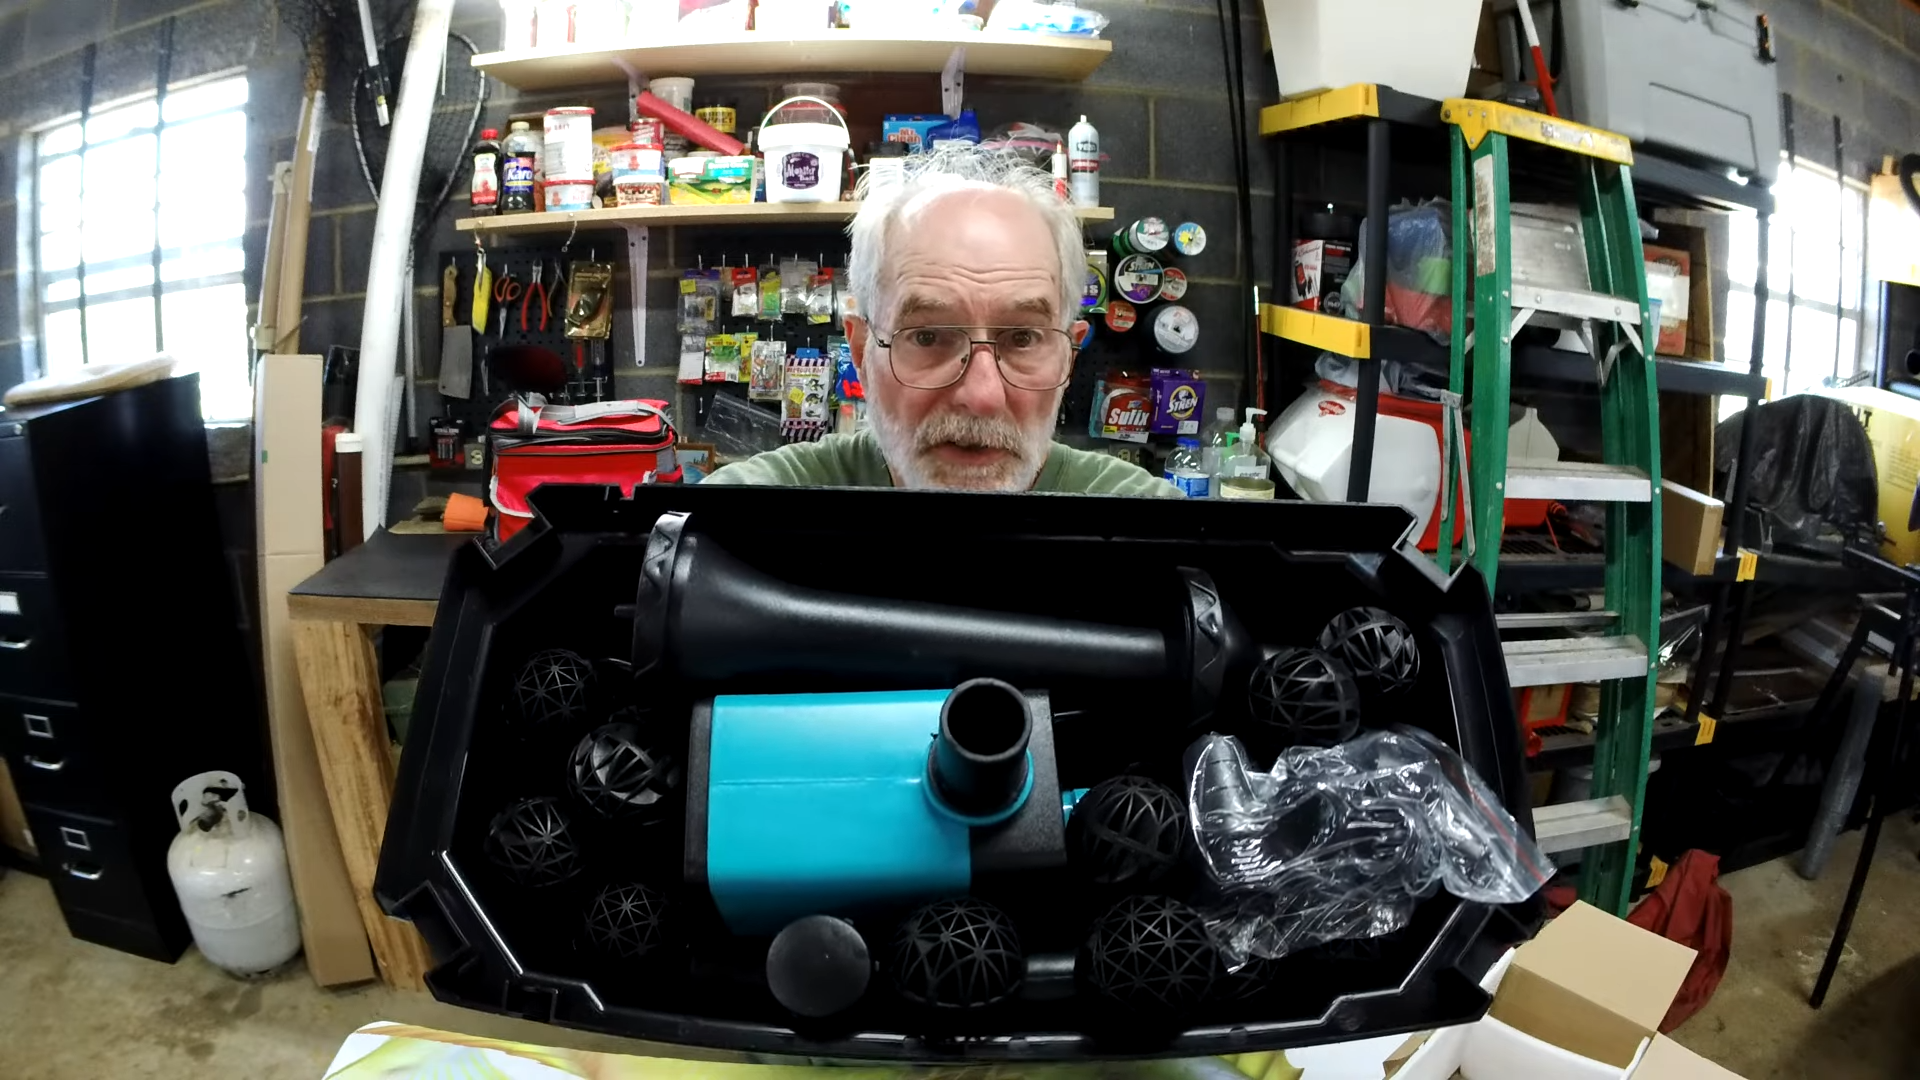
I’m going to take a short break from what I was doing to show you something we were sent. This is a 25W solar panel from a company called Poposoap. It comes with a simple mounting bracket, so you can hang it or push it into the ground and angle it toward the sun.
More importantly, it also includes a compact submersible pump. The pump comes with several interchangeable fountain heads. It also includes a tube, making it suitable for bird baths and other garden water features. One of the best things about it is that it’s completely free to run thanks to the solar panel.
To use it, the pump needs to be fully submerged in water, with the fountain head positioned just above the surface. As soon as the solar panel faces the sun, the pump starts instantly, which is really impressive. The flow is quite powerful, but it can be adjusted to suit your needs.
If you take the pump out of the water, it automatically stops, which is a helpful safety feature. It also has a small built-in filter on the intake that can be cleaned periodically.
The kit includes different spray fittings, and swapping them out is quick and easy. It also comes with a length of silicone tubing, which is useful if you want to connect it to an existing water feature.
We’re planning to use this pump in our pond once it’s finished, mainly to keep the surface water moving. I’m genuinely impressed by how powerful and versatile this small solar pump is. There’s a link in the description if you’d like to explore more Poposoap products. For now, it’s time to stop playing around and get back to work.
Gardening Time: Brassicas Ahoy!

While we were down by the tank in the garden, we decided to get some much-needed gardening done. We picked up a selection of brassica plug plants, which are a bit of a shortcut, but they make things much easier. I do plan to grow from seed later on, but for now this works well.
This batch includes broccoli, cabbage, white cabbage, and Lombardy cabbage. Between us, the pigs, and the chickens, there will be plenty of greenery to go around. These plug plants are going into the two garden beds here. As you can see, the beds have been fully cleared and topped up with fresh compost to refresh the soil. With two types of cabbage and some broccoli, I’m mixing the planting rather than keeping everything separate. I’m also adding some self-seeded nasturtiums and marigolds around the bed. They help brighten the space and act as sacrificial plants. The hope is that butterflies will lay fewer eggs on the cabbages.
Lime Marmalade Attempt (and a Mishap!)

For the third lime recipe this week, I’m making lime marmalade using a quicker method known as the whole fruit method. I started with 2.5 liters of water, which I brought to a boil, and added one kilo of washed limes.
The limes were simmered for about two and a half hours, until the skins became very soft. While they were gently cooking, I was able to step away and take care of the animals. The smell during this stage was absolutely wonderful.
Once the limes were soft, I took them out of the cooking liquid. I then topped up the remaining liquid with water to bring it to about 2.7 liters. The softened limes were then cut into chunky pieces, keeping all the juice and pulp, as we both prefer a marmalade with some texture.
Next, I added 75 ml of freshly squeezed lemon juice, followed by 1.5 kilos of sugar. The mixture was simmered for around an hour and twenty minutes, until it reached marmalade setting point. While the marmalade was cooking, I washed and sterilized the jars. Once ready, the hot marmalade was carefully poured into the jars using a funnel to avoid spills. In the end, this batch made six jars of lime marmalade, which were sealed while still hot.

25W 320GPH Solar Water Fountain Pump
$89.99
Power your outdoor pond with this 25W solar fountain pump. Delivers 320GPH flow for a beautiful, eco-friendly, and wire-free water feature.
FAQs
The solar pump can be used in bird baths, ponds, small water tanks, and garden features. With interchangeable spray heads and tubing, it adapts to many outdoor setups.
Yes. The pump automatically stops when it is taken out of the water, which helps protect the motor and improves overall safety.
Yes. When placed in direct sunlight, the pump produces a strong, adjustable flow that helps keep surface water moving and prevents stagnation.
Maintenance is minimal. Periodic cleaning of the intake filter and removing debris helps ensure consistent performance.
Leave a comment
All comments are moderated before being published.
This site is protected by hCaptcha and the hCaptcha Privacy Policy and Terms of Service apply.