


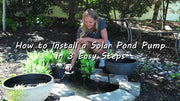
Are you nervous about installing a solar fountain pump for the first time? Don't worry! Whether you are new to ponds or want to experience DIY fun quickly, just follow this simple tutorial and the Poposoap solar fountain will soon revitalize your backyard, bird bath or patio - no pressure!
Unboxing: What's in your Poposoap set?
Before you start installing, let's check the accessories in the box!
The set should include:
- Solar fountain pump body
- A set of replaceable nozzles (multiple water spray modes)
- Solar panel with wires
- Bracket or ground plug (for solar panel fixing)
- User manual & quick start guide

3-step minimalist installation process
Step 1: Connect the nozzle to the pump body

Choose a nozzle: What type of water do you want? Bubbles, showers, multi-hole sprays, etc., you can choose.

Install the nozzle: "screw/push" the selected nozzle into the water outlet of the pump to ensure that it is tight and leak-proof.

Check the seal: shake it gently to ensure that it is firm and not loose.
Step 2: Put the pump into the pond, bird bath, flower pot or balcony water tank

Choose a good location: Place the pump body in the middle of the water body or on a flat surface. If the pond is deep, you can use bricks or a base to raise the pump to the appropriate water level.
Organize the wires: Straighten the wires to avoid knots or tripping.
Keep the water pump completely submerged: If the pump body floats up, use a suction cup or small stones to weight it.
Step 3: Place and connect the solar panel

Choose a location with the most sunlight: Let the panel face south, without shade, eaves, or fences.
Adjust the angle: Tilt the panel moderately towards the sun to ensure maximum energy absorption.

Fix the panel: For soft ground, you can use a ground plug, and for hard ground, use a bracket. Keep the panel within the cable length range of the pump (do not soak the connection in water).
Wire storage: Excess wires can be organized with cable clips or cable ties, and it is safer to run the wires along the ground or behind stones.
First start and quick test
- Fill the pool/bird bath and make sure the pump body is completely submerged.
- Connect the pump to the solar panel.
- Let the sun shine: As long as the sun is directly shining, the fountain will start in a few seconds.
- No water spraying? Don't panic, try to adjust the panel position, check the connection, and ensure sufficient water.
Quick check of common problems:

The water spray is too weak? Replace the nozzle or clean the filter.

The pump does not start? Check whether the impeller is blocked by debris.
FAQ for common installation questions
Q1: Why doesn't it spray water after the first installation?
A: Please make sure that the panel is in direct sunlight, the pump body is fully submerged, and the nozzle is not blocked. The battery may need to be pre-charged when some new pumps are used for the first time.
Q2: What if the wires are too short/too messy?
A: Plan the layout in advance before filling the water. Please use outdoor solar cables when you need to extend. Use cable clips or cable ties to organize the excess wires.
Q3: What if the pump body floats or deviates?
A: Fix it with a suction cup, or tie small stones to the bottom of the pump. If it is a smooth bird bath, you can also stick it to the bottom with aquarium-specific soft glue.
Q4: The nozzle is crooked/the water flow is too weak?
A: Check whether the nozzle is aligned and firm. If it is blocked, rinse the nozzle and filter with clean water.
Q5: My flower pot is very small, can it be used?
A: No problem! Poposoap solar fountain is suitable for small scenes, as long as the water volume is sufficient and the water spray height is appropriate.
Article demonstration & one-click help
Want to see the whole process?
Watch our 1-minute official installation demonstration article.
- Have questions or special scenarios?
Welcome to leave a message in the comment area, or click "Contact Us" to get one-on-one installation guidance - both the official and user community experts are happy to help!
Why choose Poposoap? (Brand Promise)
Really easy to install: no need to connect to electricity, no need for professional plumbers, 0 pressure, novice-friendly.
Full process with pictures/GIFs/articles, review at any time, official help at any time when encountering problems.
Show your order to win gifts: share your DIY beautiful pictures, #Poposoap and you will have the opportunity to receive exquisite accessories!
Are you ready to make your pond come alive?
Unboxing, installation, and enjoying the beautiful scenery - Poposoap takes you to own your own waterscape with zero difficulty!


