


How to install the Poposoap solar water fountain outdoor? A step-by-step tutorial with pictures and texts that novices can easily do
Want to create an ecological waterscape corner in your backyard that does not require electricity, does not consume electricity, and can attract birds to stay?
The Poposoap 8W solar pond fountain pump (model P108D) is your ideal choice. This product is designed for home users and is suitable for bird baths, small ponds, or DIY rockery waterfalls. It has powerful features such as a solar drive, battery life on cloudy days, low noise, and anti-dry burning. It is easy to install and maintenance-free!
This tutorial will present you with a complete set of installation and debugging processes through step-by-step pictures and texts. Even a gardening novice can get it done in 10 minutes!
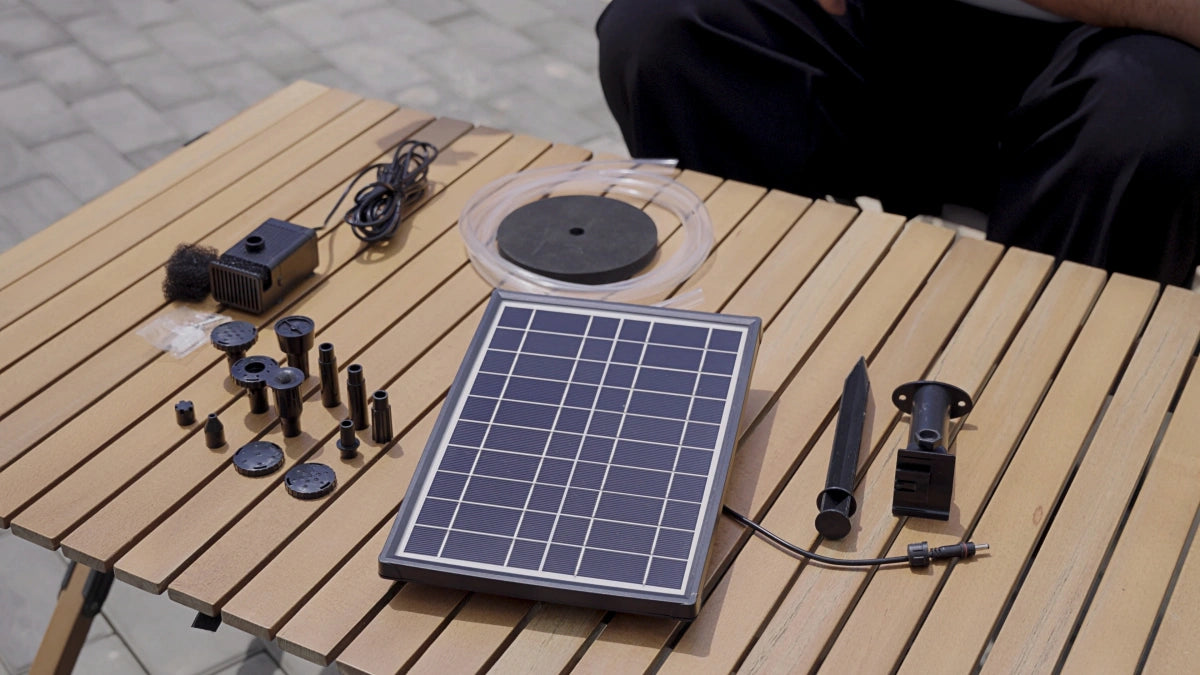
Pre-installation inspection: List of components you received
Please check the following list before unpacking to confirm that all accessories are complete:
| Component | Qty | Description |
|---|---|---|
| Solar Panel | 1 | 8W monocrystalline panel with ground stake mount |
| Pump Unit (with Battery) | 1 | 3000mAh battery, dry-run protection, low-noise |
| Spray Nozzles | 8 | Includes umbrella, column, aerator, and spinning modes |
| PVC Hose | 1 | 5 ft long, for connecting waterfalls or water features |
| Floating Foam Pad | 1 | For floating-style pump installation |
| Filter Sponge | 1 | Prevents debris from clogging the pump |
| Ground Stakes | 2 | To secure the solar panel on soft ground |
Installation Site Tips:
- Choose a location with at least 4 hours of full sun daily.
- Water depth ≥ 6 inches.
- Avoid shaded areas (trees, roof eaves).
- Ensure easy access to clean and monitor the fountain.
Step-by-Step Installation Guide

Step 1: Attach the Nozzle and Hose
- Select one of the 8 nozzles based on your desired water effect (we recommend starting with the umbrella nozzle).
- Twist the nozzle firmly into the pump outlet.
- If you’re creating a waterfall or elevated water feature, attach the PVC hose to the nozzle and run it to your outlet point.
Pro Tip: If the hose connection feels loose, use waterproof tape for added grip.

Step 2: Insert the solar panel and adjust the direction
- Insert the ground stake into the soil or lawn.
- Fix the solar panel on it, making sure it faces south.
- Adjust the tilt angle:
Summer: 45° tilt is recommended
Winter: 60° tilt is recommended to improve lighting efficiency
Picture suggestion: The solar panel is inserted into the grass diagonally facing south, facing the sun.

Step 3: Choose the installation method
Floating installation (recommended)
Fix the foam cotton to the bottom of the pump body.
Let the pump body float freely on the water surface.
Make sure the pump body is completely submerged, and the top of the nozzle is about 2-3cm above the water surface.

Submerged installation
Put the pump body directly into the bottom of the pool, and it is recommended to fix it with a suction cup (sold separately).
Note: If the pump body is not completely submerged, the dry burning protection mechanism will be triggered and the power will be automatically cut off.
Step 4: Connect the power cord and test
Insert the solar panel cable into the pump body port.
Tighten the waterproof nut.
In sufficient sunlight, the fountain pump will start automatically without a button!

Pit avoidance reminder: 5 most common installation errors
| Mistake | What Happens |
|---|---|
| Facing panel north | Poor charging, no water flow |
| Pump only partially submerged | Auto shut-off triggers |
| Loose nozzle or hose | Irregular water spray or leaks |
| Testing on a cloudy day | May appear “broken” |
| Not cleaning filter | Reduced flow or full blockage after 3–5 days |
Every small detail will directly affect the performance of the fountain, so be sure to check it carefully!
How to judge whether the installation is successful?
- Automatically start in 3-5 seconds when there is sufficient light.
- The water spray height should be between 20-24 inches.
- The sound during operation is less than 50dB, almost noiseless.
- On cloudy days, 3000mAh battery can support 2-3 hours of low-flow operation (light <2000Lux).
- It does not work at night, which is a normal design and environmentally friendly.
- Daily cleaning and maintenance recommendations.
Daily cleaning and maintenance recommendations
First week cleaning:
Disconnect the solar panel.
Take out the pump body and filter sponge and rinse with clean water.
You can use a soft brush to gently brush away impurities.
Deep cleaning once a month:
White vinegar cleaning instructions: Mix 10ml white vinegar + 100ml clean water, soak the filter sponge for 15 minutes, which can effectively decompose algae residues.
Laboratory test number: LCH-2024-A01 (the pump body material is compatible with this solution, and it is safe and reliable for long-term use)

FAQ
Q: Can the solar pond fountain pump work at night?
A: No. The battery is only used for energy replenishment on cloudy days, and it will automatically stop running at night when there is no sunlight.
Q: What should I do if the water output is getting weaker and weaker?
Check whether the filter sponge is blocked, whether the nozzle is tightened, or whether the solar panel is shaded.
Q: Can it be used in fish ponds or turtle ponds?
Yes. The pump body material has passed the EPA environmental certification and is safe and non-toxic to aquatic life.
Q: Can the battery be replaced by yourself?
Yes. Operation steps: The battery compartment is located at the bottom of the pump body. Unscrew the 3 waterproof screws to remove the old battery. It is recommended to wear gloves to avoid water ingress.
User feedback: Sharing real experience
"After I installed the fountain in my Texas backyard according to this tutorial, 7 different birds came to bathe and drink water within a week. My grandson now names them every day!"
--Mia G., Poposoap real user

You Did It – Your Solar Fountain Is Ready to Shine!
No electricity. No hassle. Just sunshine, clean water, and the calming sound of your personalized water feature.
Shop the Poposoap P108D Solar Backyard Fountains >>


