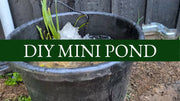
Building a mini pond garden in your yard or balcony can not only add natural wildness to the space, but also attract small animals such as bees and birds. This article will detail how to use ordinary buckets to make a beautiful and practical miniature waterscape, which can be easily completed even by gardening novices.
Prepare Materials and Tools
Container selection: A bucket with moderate capacity (the bucket used in this article is suitable for fishless landscapes, and a larger container can be selected if you need to raise fish).
Core equipment: Poposoap pond filter box kit, which is the key to making the waterscape "alive".
Decoration materials: Rocks of different sizes (clean before use to avoid bringing in soil), flat stones.
Plant selection: Aquatic plants transplanted from existing ponds (including taller background plants and shallow water plants).
Auxiliary items: Weighted ball for fixing the water pump.
Specific Construction Steps
Step 1: Layout of the Water Pump and Base

First, put the water pump into the filter box. To prevent it from floating, it needs to be fixed with cleaned rocks and weighted balls. First place larger rocks around the water pump, and pay attention to placing the water pump as far back as possible to avoid blocking the line of sight. Pay attention to the balance of weights in this link. If too many rocks are placed, you can adjust them appropriately to ensure that the water pump is stable and does not affect subsequent operations.
Step 2: Construct a Layered Landscape

To increase the three-dimensional sense of the waterscape, you can build a height difference in the bucket. Place a flat stone on the higher rock as a middle platform, and then stack several flat stones to form a staggered structure. This design is not only beautiful, but also provides growth space for plants with different habits.
Step 3: Plant Planting Tips

When transplanting aquatic plants from an existing pond, pay attention to the integrity of the root system. Taller plants are suitable for planting in the back of the bucket as a background, such as the varieties mentioned in the article that may grow vigorously. When planting, reserve enough growth space. For plants like water lilies, you can first lay small stones on the bottom to fix the roots, and then cover a layer of rocks to prevent the soil from floating. Shallow water plants can be planted near the edge, and fill the gaps with small stones after planting to ensure that the plants are stable.
Step 4: Add Water and Debug

After completing the planting of plants, fill the bucket with water until the water level at which the pump can be observed to work normally. During the water filling process, be careful to avoid direct impact on the plant roots. After filling, turn on the water pump power supply, observe the water flow effect and the operation of the water pump, and ensure that the water outlet is not blocked and the water flow speed is moderate.
Step 5: Safety and Ecological Optimization

In order to prevent small animals from being trapped, an "escape channel" needs to be set between the edge of the bucket and the water surface. This is achieved by placing climbable rocks in the article, so that even small animals such as mice can climb out smoothly. At the same time, this design can also provide drinking points for bees and birds, enhancing the ecological value of the waterscape. After debugging, the position of rocks and plants can be adjusted according to personal preferences to ensure that the overall landscape is coordinated and there are no safety hazards.
Maintenance and Expansion Suggestions
Daily maintenance: Regularly check whether the water pump is blocked. If the water flow is found to be smaller, the filter needs to be cleaned in time; observe the growth status of plants and prune overspreading varieties.
Creative expansion: You can try to add decorative elements to the waterscape, such as the elderberry branches mentioned in the article (which can be used as fun pipes after drilling holes); if you want to upgrade the landscape, you can use the water pump to build a slightly larger waterscape and flexibly expand the application scenarios.
Such a mini container pond garden can not only bring the beauty of water to indoor and outdoor spaces, but also become a small window for observing natural ecology. From preparing materials to completing the layout, the whole process is full of hands-on fun. Hurry up and create your own miniature natural landscape!


